Tips on How to Take Photos of Your Artwork
The painting today is a ‘red eye’ as in red eye deduction but that’s not one of my tips as we’re not working with people for this, it’s about photographing your paintings. Before we go too deep I need to point out I’m no expert in this field, in fact my own art photos are not always perfect but it’s a work in progress! Please feel free to add your own tips of you have any as I’m sure other artists will be most grateful.
Taking a good photograph of your artwork is a crucial step in the process of displaying and selling your art online. If you take photos that are quick snapshots of your art hanging on the wall, you can be almost certain it’s not going to look professional. People viewing your artwork online can only go by what your photos portray to them and you only get one chance to make that first impression, make sure it’s a good one.
How to photograph your artwork:
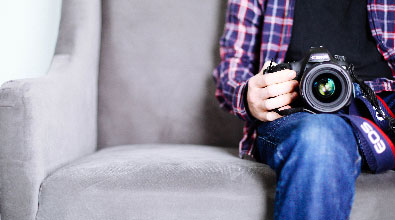
Start by using a suitable camera, the SLR types are the best choice for taking photos of your art, but point-and-shoot cameras will work also, that’s what I use as I have no need for an expensive set up. The most important thing is knowing how to use your camera.
Size of digital files -
The highest mega-pixel the better if you intend on selling digital images as prints you will need to use a high mega-pixel setting so use whatever your camera allows you to go up to for that. I suggest you take your photos at around 5 mega-pixel for general use, saving a copy for your file and decreasing the for an internet copy also.
Clean the lens -
Follow the directions in your manual so you don’t accidentally scratch it. Use a really soft cloth as camera lenses are very easy to scratch!
Select a location -
Choose somewhere where the light is soft and will be even across the entire image. Avoid harsh, direct sunlight; look for light shade or an overcast day. Outside in the shade is the best. I find early morning or late in the day when the sun is low enough to not cause glare best for me.
Turn off the flash –
to avoid that glare or shiny spot that spoils the effect of your artwork, don’t use the flash on your on-camera! Check the manual that came with your camera if you don’t know how to turn it off.
Use a fast shutter speed -
Slow shutter speeds can cause blurriness in your photo. Check your camera manual for more shutter speed details.
White balance -
Set the white balance for the light you’re using, to prevent your photos from looking blueish (if you’re outside) or yellow-orangeish (if you’re inside).
Place your art upright and use a tripod -
Prop your artwork against a white, gray or black backdrop. Cardboard covered by a white sheet will do. The art should be leaning nearly vertical, but make sure it won’t slip or move when you walk away from it. If you have a tripod use it, I brought a small one off www.trademe.co.nz for next to nothing and it sits on the table. It’s virtually impossible to get quality photographs of artwork without using a tripod to be honest. Don’t knock the tripod in any way. It’s also best to use the delayed setting, so you can press the button and be done touching the camera by the time the photo is taken.
Centre the image -
with your camera on the tripod, position the camera in the absolute centre of the image. Look from the side, and make sure the art and camera planes are equal to each other. Make sure art and camera are both level. (Use a small level if you have one.) Set up your composition to leave a bit of the backdrop in the image as most cameras will have some sort of fault in the lens that warps the corner of your artwork to some degree, it leaves you room to crop that out later.
Take multiple photos –
this is just in case, so that when you come to upload them to your computer you can choose the best one in case some are not what you want.
Check your photos on the computer -
download your first set of images to your computer and open them in an image editor. Pick the best one, magnify it to 100% and look for any problems, such as:
Make sure there is good detail in both the light and dark areas of the image. Look for spots that are completely white when they shouldn’t be as this isn’t good.
If your image is blurry, refocus your camera on your artwork and increase your shutter speed. You may also need to pick a location with more light.
A dirty camera lens will create dust spots on your photos. Either clean the lens, or remove the dust spots digitally in your image editor.
Make sure the image isn’t distorted or tilted. If your image editor has ruler lines available, use those to check that your vertical and horizontal lines are level.
If you have any of these issues, adjust your setup, take another shot and inspect it on the computer. Repeat as needed.
Don’t worry too much about colour differences as different computer monitors vary widely in their colour and brightness. If the camera’s white balance was set correctly, the actual digital photograph should be correct.
Cropping and editing -
open the photo in your image editor and crop off the excess background. Save it as a jpg or tiff image with maximum quality, and then a web version which is smaller which you can then upload to the web.
Posted: Tuesday 22 June 2010