Tips on How to Use Crackle Mediums with NZ Artist Collette
Artists who work in texture usually want to know about the crackle effect if they don’t already know how to use it. It can be very temperamental so understanding how to use it will save you a lot of grief later on.
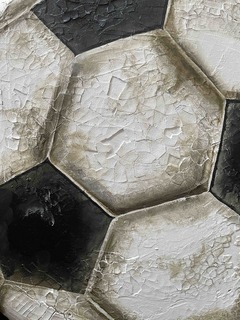
Crackle effect is a fascinating technique that can add a unique texture and visual interest to your paintings. This effect is characterised by a pattern of cracks that appear on the picture's surface, giving it a weathered, aged appearance.
There are a few different methods that you can use to create the crackle effect. One of the most popular methods involves using a crackle medium. This medium is specifically designed to make the crackle pattern and can be applied over a base coat of paint.
How to use Use Crackle Medium
Learning to use the crackle painting technique is simple enough to learn.
Step 1.
Choose what paint, crackling medium and other materials you want to use. You need to choose two different paint colours, an undercoat that will show through the crackling, and a top coat colour that will be the crackled paint.
They need to be quite different for you to be able to see ( i.e. a white background with a black topcoat will show up really well.) The crackling medium itself is colourless. The golden paste is an opaque white but we will deal with the more traditional method to start off with.
Step 2.
Cover and mask surfaces you do not want to paint. Use masking tape to mask surfaces immediately adjacent to the surface you'll be painting.
Step 3.
Apply the undercoat colour according to the paint instructions. Allow to dry for approximately 4 hours.
Step 4.
Apply the crackling medium. Use a paintbrush to give a directional effect to the crackling, or use a roller to achieve more uniform crackling. Allow to dry for at least 1 hour but no more than 6 hours to apply the finishing coat.
Step 5.
Apply the top coat.
Apply the paint thickly for more crackling, or apply the top coat paint thinly for subtle crackling. The direction you paint in will be the direction the paint will crackle in so keep this in mind if it matters which way you want it to go.
Work quickly and with a large brush for this as going back over the crackle medium will often lift it and it wont crackle effectively if at all.
Step 6.
Remove the masking tape after a few minutes, while the paint is still fresh. Do not wait for the crackle painted area to dry completely, as this may cause the fresh paint to lift off with the masking tape.
Step 7.
Allow the crackle painted surface to dry completely.
It can then be varnished, although do be aware that varnish will make it crackle even more. This is great if that's what you want, not so great if you don't!
Do keep in mind each product does things slightly differently so make sure you read the instructions and follow them to get the effect they are supposed to create
It's important to note that the size and shape of the cracks will depend on the thickness of the crackle medium and the thickness of the top coat of paint.
You can experiment with different layer thicknesses to achieve the desired effect. I personally like to vary the layer thicknesses so I can get a range of fine to heavy cracks in my artwork.
Other Methods
There are a few other methods that can be used to create the crackle effect as well. For example, some artists use glue to develop cracks.
Glue -
To use this method, apply a layer of glue to the surface of the painting, and allow it to dry until it is tacky. Then, apply a top coat of paint, and the cracks will begin to appear as the paint dries.
Eggshells -
Another exciting method involves using eggshells to create cracks.
To use this method, crush a few eggshells into small pieces, and mix them into your paint. As the paint dries, the eggshells will create small cracks and fissures in the surface of the painting, resulting in a unique crackle effect.
Regardless of your specific method, the crackle effect is a fantastic way to add interest and texture to your paintings. Experiment with different colours, layer thicknesses, and techniques to achieve the perfect look for your artwork.
With a bit of practice and patience, you can create beautiful paintings that will catch the eye of anyone who sees them.
Crackle painting has been around for many years and is a faux painting technique that produces a finish that looks like weathered cracked paint with older layers of paint showing through.
It is not just for abstract work nor is it just to make things look old such as in still life style works or for those fake historical knockoffs (Because yes this is what they do to make them look more legitimate).
Usually, crackle paint is used on furniture, cabinetry, or on trim and moulding, but it can also look great on artwork.
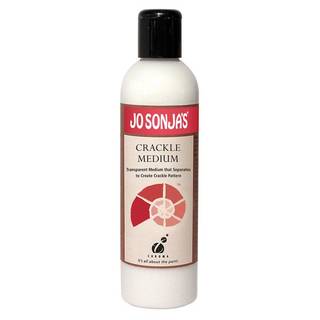
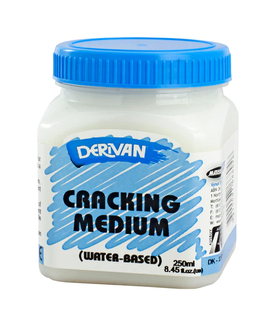
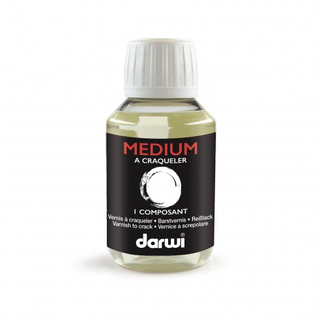
Supplies are easy to find with several different brands available at almost any art store or craft supplier. Even places that make house paint have some. Here are some pictured below, you can purchase these from most art suppliers

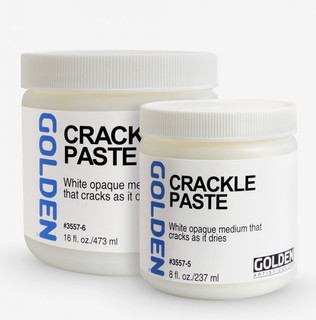
Depending on the effect you hope to achieve, you would use different types of medium. The Golden range has a wonderful thick paste type medium that works well for a dry earth type effect with deep crevices while rabbit skin glue and other types that are painted on in-between coats of paint are good for a slightly more controlled effect. (Rabbit skin glue smells really gross, so don't say I didn't warn you!)
I say slightly controlled tongue in cheek as it is one medium that likes to do its own thing with different outcomes each time depending on several variables which I’ll explain below. For the first effect I’ll talk about, I like to use the Jo Sonya crackle medium for most effects and then the golden crackle paste which is different again.
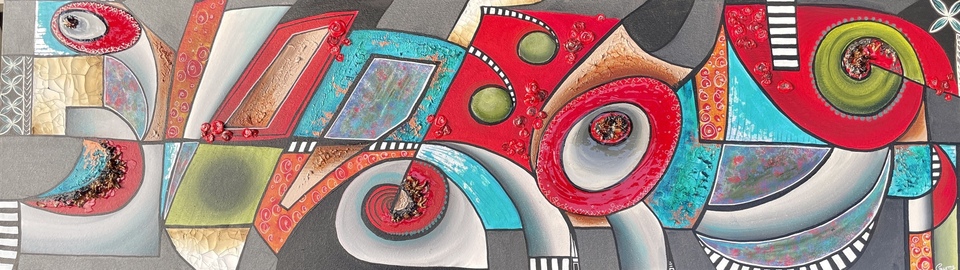
Bearchhhh
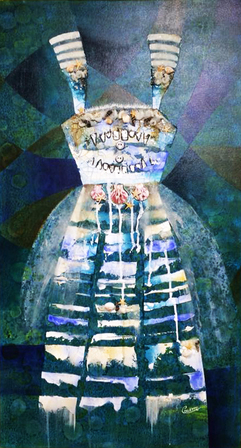
This image is of a painting of mine using some Golden Crackle Paste in parts for a crackle effect.
Heres how to use Golden Crackle Paste Medium
Golden crackle paste medium is quite different to the ones discussed earlier as its more a thick paste and very opaque. Because it's more stable, I use it the most because I like the heavy cracks you can get when applying a thick layer.
Step 1.
Start with a firm substrate.
Golden recommends using board or wood panels for this, but says it's fine to use on canvas. It is my preferred substrate and I have not had any problems with it warping the surface.
You must stretch your canvas or, if you are using paper, stick it down, as it will warp in these situations. The product is meant to 'fail' and needs to shrink to create the cracks we are after.
Step 2.
Apply your Gesso layers as it needs a rough surface to stick to but you can use other gels or pastes as your under layer. I like to add a paint layer as well, since the colour showing through the cracks is key to the final finish. Just make sure it is not a smooth finish. Let these initial layers dry fully.
Step 3.
Apply the paste to the surface.
A palette knife works best as you get a smoother top coat that crackles better. You will still see marks from the palette knife so keep that in mind for your final finish.
I have tried applying this with a brush thinking the bristles would add to the effect. However, it wasnt as amazing as I had expected and seemed to interfere with the crackling finish.
The thickness of this layer will determine how deep the layer of cracks will be. Fine cracks appear with a thin layer and deeper cracks in the heavier areas, similar in appearance to dried mud on a sun-baked surface.
The edges curl up slightly so if you don't want that to happen, don't apply too heavily
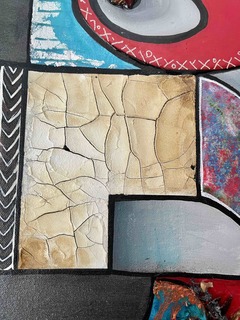
(Section of an artwork howing Golden Crackle Paste Medium)
As part of my art classes, I like to have students apply the paste in different thicknesses on sample pieces so they can see the variations.
Do keep in mind you can't fully control what happens. This is because it has a mind of its own. Things like the absorbency of the surface you're working on, temperature and humidity along with airflow, and how thickly you apply it will determine the outcome.
If you wish to retain the white colour in this layer Golden recommends you add some titanium white paint to the paste as it does yellow over time.
You can tint the paste with other colours, but keep in mind that it is opaque, so it will dilute the colour just as when you add titanium white when painting. The ratio recommended is 20% paint to 80% crackle paste maximum.
I often paint over the crackle paste especially as I like to apply it thickly so it helps to protect the pieces that turn up on the edges and keep them where they’re meant to be.
Step 4.
Now Wait!
Do not try to hurry it along, it takes its sweet time and can take days to dry. I usually find doing this at the end of the day and leaving it overnight to cure is enough for me.
I find that summer time and winter are great seasons here, but autumn and spring tend to have high humidity where I live, which can cause the crackles to not function, so I try to do it earlier in the day and allow them to dry in the sun.
Step 5.
If painting on top, keep your layers thin if you want the colour in the cracks to show and make sure the colour contrasts like black under white or vice versa.
If you find your paint settles into the cracks you can do washes over the top once dry and wipe the top surface as you go with a sponge to keep the colour in the cracks. This works really well with antiquing.
Step 6.
Seal with a layer of heavy gel.
This comes in matt (flat, dull) satin (semi-gloss) or gloss (shiny) so you can choose the finish at this stage. This paste is water based and dries to a matte finish.
This is absorbent so you can play around with watered down acrylic paint and be able to do lots of blending similar to watercolour effects if you wish.
Step 7.
Cleaning up, just use water.
Its easy to clean up although once dry it is a bit tricky to remove (Do not let it dry on carpet or surfaces that are not smooth and shiny, you will regret it!
So all in all crackle mediums are fun to use if you follow the instructions and are prepared to have it do its own random things. You can determine the outcome a little better once you have used it a few times.
This is such a fun texture finish to use for mixed media art and can be used on furniture as well. However, I wouldn't recommend the Golden paste for furniture.
The other types will be much more resilient for such projects.
Posted: Sunday 21 February 2010