Decoupage is the art of decorating objects, art or furniture by gluing coloured paper cut-outs onto them along with special paint effects, the addition of gold leaf and other mixed media effects. Commonly an object like a small box or an item of furniture is covered by cut-out pictures from magazines or from purpose-manufactured papers. Each layer is sealed with varnish or lacquers until the ‘stuck on’ appearance disappears and the result looks like painting or inlaid work. The traditional technique uses thirty to forty layers of varnish which is then sanded back to a polished finish.
It was developed back in the 17th century in
The Victorians loved the effect and often went overboard with heavy finishes on things like firescreens and serving trays.
You can create really nice decoupage effects without too much fuss or technical skill as the art itself is more about the arrangement on the surface you are putting them on rather than the selection or cutting out of designs.
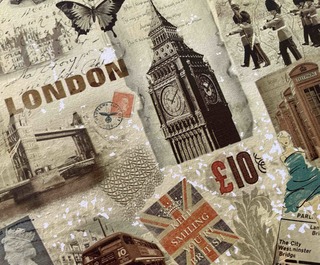
Materials are easy to source, there are s that specialise in paper crafts and most art s have a huge selection of designs to work with. Don’t forget about things like magazines, calendars, catalogues and even wallpaper or wrapping paper as you can get some amazing pictures without the expense from these resources.
If you find that you want the size altered on a particular image, then try photocopying it and reducing or enlarging it there. It does pay to check that varnish won’t smear the design though if using this method especially on home ink jet printers as they may not be colourfast or stable enough to take varnish.
The best way to do decoupage properly is to map out your design before applying it, if you are confident enough and have an eye for detail then you may feel ok to freestyle it, however its not recommended, even experts can make mistakes and you may come up with a completely different look that is better if you use some pre-planning.
Make your map on a piece of paper the same size as the surface area you are going to decorate. Cut out the pieces you will be using with a scalpel and when happy you can start gluing the pieces down onto your clean dry pre-prepared surface. A fixative spray is usually best to use on the design side of your pieces at this stage to prevent any problems arising when varnishing. Use glue like PVA to stick the pieces down, making sure they do not overlap. Meeting edges must be butt-jointed.
If you have one, a small wallpaper roller will help to remove air bubbles you may have trapped under pieces when gluing them down.
Leave the artwork to dry at room temperature before you start applying any varnish or lacquer.
For an aged look you can use varnishes like shellac which come in natural shades of gold’s and browns or you can try tinting your varnish yourself with a tiny bit of translucent coloured paints (Opaque colours tend to dull the effect and ruin the finish as its like adding a veil of white when you use them.)
For extra aging, even try the crackle effect with your varnish, the method for this is described in an earlier post on this blog.